Wednesday, 16 December 2015

Catch Up for 2015

I'm afraid this little blog has been sorely neglected, but I'm wondering if anyone would miss it if it went away....if you would, then please leave a comment. Otherwise it's on the way out....forever.

Blogs are strange things. For awhile they were really fun ways for everyone to keep up to date with friends and their "doings". It seemed especially great for crafters to share projects, for photographers to showcase photos, cooks to offer recipes, etc. but now it's become a really big business and I'm afraid that we mere amateurs are a dying breed. Some enterprising individuals are even making a living being a blogger! That may work for some, but it's very time-consuming to keep fresh and to blog often, that is unless it really IS a full-time occupation. For those kinds of blogs, you get company endorsements, free products to try, and lots of feedback. It hasn't worked that way for me, but because I simply don't have the time to devote to it.

Here's what I've been up to since the last post. First I made a sewing machine cover to match my "sewing tidy". I didn't have a pattern, I just measured my machine, then threw myself into it. I'm happy with the way it turned out.

I used some scraps of the same fabric as the sewing tidy  (shown here with the machine sitting on it) and plain muslin (or calico). 
I wasn't really satisfied with it until I ran a top stitch around the top, however, as it needed more "definition". Now it seems to sit better.

Next is a patchwork tote bag. I didn't really have a pattern for this either, but followed (loosely) a video on YouTube from the Missouri Quilt Company and Crafty Gemini. The first photo is the front, the second is the back.


The bag is made from less than a half-jelly-roll and a base of Bosal-In-R-Form Plus, a kind of fusible foam fabric. It keeps its shape almost perfectly so it's perfect for making bags and anything with a shape. It's really easy to use but I found it a little fiddly due to the fusible feature. It's too easy to get it wrinkled. You could make covers for iPads, laptops, smartphones, etc. and the video is very easy to follow.

Next I made a little fabric box for trinkets, pins, cotton balls, jewelry, or whatever you need it for.

These also are easy-peasy. They're made from two 10" square pieces of fabric and a little wadding (UK) or batting (USA). I found this tutorial online also, at http://seaside-stitches.blogspot.co.uk/2013/03/fabric-box-tutorial.html. I made a different one for each of my craft group friends for our Christmas meeting.

For crafty things, that about sums it up. I had some foot surgery that has really knocked me back about two months...and counting. I'm looking forward to a new year for 2016. I just want life to get back to normal.

For anyone reading this, I hope you have a wonderful and happy Christmas and a great new year. I don't think I'll keep the blog open unless I hear from someone, anyone, so I know it's being read.


Tuesday, 25 August 2015

Little things

I've decided I may never make a full-sized quilt. It's not that I've decided consciously to not attempt it, but I just find I love doing small projects far more.

First, as an update from my last post, I've abandoned the quilt-along group. They are doing absolutely beautiful work but I fell flat on my face with the first block. First attempt was a disaster.
First attempt at "Addie" block
You can see from the lower panel that already it's out of sync....the triangles don't match the same way. Believe me it got much worse than this..... so I started over. This time I made certain that all my pieces were accurately and uniformly cut, then I laid them out before sewing just to orient myself as to what goes where.
Second attempt at "Addie" with different fabrics.
So far, so good. But when I actually sewed it, it was as much a disaster as the first one! I love the book, The Farmer's Wife 1930 Quilt Sampler and the writing, but IF I ever try one again, then next time I'll pick an easier block! 

My mug rugs, however (see previous blog entry) turned out very well. No pattern-- I just winged it.
Four mug rugs finished with burgundy backs
They were fun to make and not at all fussy or difficult. It probably was too easy and I chose the lazy option, but at least they're done now. First I used some heat bondable material to bond the cat silhouette to the front piece. Then I sewed a blanket stitch around the silhouette with my machine. 
The blanket stitch on my machine
Once that was done, I assembled the sandwich, using a fairly lightweight batting. After I turned the back lining inside out, I ran some quilt lines from top to bottom. If I made more mug rugs I think I would also have run horizontal lines and perhaps a contrasting binding, but for these I decided this was enough.

One more little thing is the new magazine, Simply Moderne. I just happened across it at WH Smith's and fell in love with some of the quilts, described as "modern" quilts, and other projects. No blocks or at least not many, lots of applique and just very different. This is the first ever issue so I'm looking forward to the second one. It's published by the same publisher as the magazine Quiltmania. This issue had articles about USA quilters and shops, but I suspect that this will change as it is geared toward UK readers. If you go to their website, you can browse some of the pages electronically. The magazine is a bit pricey at £11.99 but it's 128 pages where other quilt magazines are only 98 pages.

And the last little thing is that I went to a local quilt show here in Whitstable and met the nicest women, I believe most were from Abbey Patchers and Thanet Quilters. There were some lovely quilts on display, at least three different trader tables (I think I bought something from each of them!) and a tombola. I won the tombola (TWO prizes!) for the first time in my life -- two beautiful patchwork cushions.
My tombola prizes
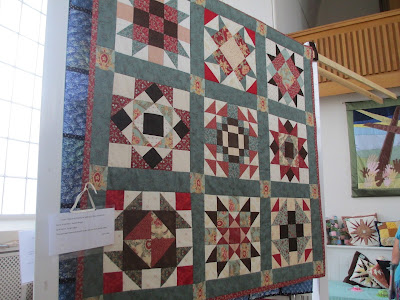
Here are a few quilts that caught my eye, though they were all beautiful:


There is another quilt show in Deal, Kent this weekend. I hope to go to that one, too.

Thursday, 30 July 2015

Pitter Patcher

A little of this, a little of that, a lot of nothing, really! My head is absolutely FULL of ideas these days, but as usual there's little action. I managed to cut out some mug rugs. No pattern for these, just playing with them, so far.
For the cat silhouette, I cut out triangles, then drew (free-hand) and cut the heads and tails. The plan is to use fusible webbing to attach them to the mug rug, then  quilt (the wadding is cut to the size of the mug rug), then bind with the red fabric at the top of the photo. 

Two more projects already in the pile are a sewing machine cover and a bread basket. Oh, and my In-R-Form Plus arrived from the U.S. so I'll also be making the tote bag shown here with my jelly roll. See what I mean about no lack of projects?!

On top of that, I just joined a quilt group online. It's at The Quilting Board in the "Blocks of the Month" sub-forum. We're using a book titled The Farmer's Wife 1930s Quilt Sampler, which just arrived this morning from Amazon. It has instructions and a CD for making 99 blocks for a quilt.

I've wanted to tackle a full-size quilt for some time, but all the ones I see are just plain intimidating. Beautiful, but involves lots of coordinated fabrics and skills that are probably a bit beyond me.  These blocks are only 6" square and seem do-able. The finished quilt will look similar to the one on the front of the book and are obviously just made from scraps, not necessarily coordinated fabrics. The project begins 4 August, so I'm away and running.

I really wanted to go to the Festival of Quilts in Birmingham in August, but after our holiday in Wales last week, I've decided it's too far and I'm frankly too much of a newbie to get enough out of it. Maybe next year... and I hope that by then my knees and ankles will be better. Our Wales holiday has just about put me out of commission and into a wheelchair. Our cottage was unbelievably uncomfortable and full of steep stairs, suitable for a mountain goat.

So watch this space for some updates on my projects.

Saturday, 20 June 2015

A Bit of a Panel

As the reorg of my craft cabin continues, I've still managed to do a bit of sewing. In January at the Make-It Show in Farnborough, I bought a panel for my sewing area.

I wasn't sure if I would cut it up and make cushions or use the cut pieces as appliques for tote bags, etc. but in the end I decided to leave it whole and quilt it. Well, quilting is probably a rather loose term here, but that's what *I* would call it.

This is just propped against the bookcase but it will be hung on the wall. Here's how I did it:

First, I tacked on some wadding (UK)/batting (USA), then I machine stitched around each panel. So far, so good. Then I attached a solid colour piece as the back, but realized it would look much better if I stitched around some of the elements within the panels. Doh! Unless I took the back off, there was no way to do that. Instead I hand-stitched some of the bigger bits without catching the back. That was a little tricky and  I soon decided I'd had enough of that, so not all of the panels have hand-stitching.


I'm lazy, I suppose, but it was my first attempt and now I know what to do for the next panel project. I have a Christmas panel I bought a couple of years ago that I'm going to do this year. But here's what I've learned:

1) To make the sandwich first: panel, wadding, and a plain muslin or cotton backing.

2) Once the panel sandwich is done, THEN start stitching. Machine stitch as much as possible, then hand stitch.

3) Once ALL the stitching is done, then attach the back fabric.

That way, the inside cotton/muslin holds it together better. It doesn't matter that stitching shows on this back as it will all be covered by the back fabric.

So, I've managed to get rid of a lot of magazines but still have a few boxes of scrapbooking and card making stash to go, including lots of stamps. The problem is that my local craft friends have also gone away from scrapbooking and cardmaking to sewing, so no takers there! I need to have a garage sale, I think. I'm sure that as soon as do, however, I'll decide to scrapbook again.

Meanwhile, I think I'd like to find a local quilting, applique, or patchwork class. I'm looking at the residence-type courses at Denman College (the Women's Institute college), but they're expensive. None of the local fabric shops (there are only a couple of them anyway) offer courses and I don't have the time to do the 10-week courses offered by the Kent County Council. Ah well....!

Tuesday, 2 June 2015

Odds and Ends

I didn't realize that it's almost been a month since the last post! Honestly, I have NOT been just twiddling my thumbs. Just after my last post we went on a short visit to the Black Forest in Germany. It was gorgeous and the people were just so warm and friendly. I didn't want to leave.

View from the house where we stayed in Stockmatt.
Since, I've been back, however, I've actually been doing a little sewing and a lot of organizing and clearing out. I got rid of most all my scrapbooking and cardmaking magazines, some of which were really dear to me (and expensive, like the Somerset Studio, Stampington, and vintage scrapbooking ones that no longer publish). There were stacks of them, but I advertised them on Streetlife.com and someone has given them a very good home. I need to clear out a lot of my supplies, too, but can't bring myself to do much of that just yet. I keep thinking that maybe, just perhaps, just someday, I might want to use a stamp, a Tim Holtz die, a scrapbook paper, etc. You never know...and I'd sure hate to have to replace something I'd given away!
Just one of several piles of magazines!
So my sewing pile is growing. I haven't bought any new fabric, but just found some Butterick patterns for half price and couldn't resist that!
My just-received goodies from Weaver Dee
One of my latest sewing projects has been a tote bag. I love the fabric and the bag is certainly usable, but I wouldn't want anyone to look too closely at the construction. I still haven't mastered a STRAIGHT seam. Mine wobble all over the place. And for this bag, I followed a free online tutorial but I think I misread the instructions as the shape and size is nothing like the bag in the tutorial! Oh well, as my friend Hazel always says: "It's a prototype!" Next time I'll do it differently.

Actually a bag is the last thing I need since I have about a dozen purchased and freebies, but I just wanted to make one myself. I found this gorgeous fabric -- it's heavy and bag-perfect, though it frays like crazy.

Good news: My overlocker (USA "serger") is now out of its box. I bought it at a craft show in February 2012 and just this week opened the box! After reading about the threading problems, I was scared stiff to use it.
Silly me....choke! The truth is, I still haven't used it! I have, however, signed up for an online overlocker/serger course on Craftsy, but haven't had time to start that yet, either.

Saturday, 9 May 2015

Sew very tidy

I'm so happy. I actually made something without a pattern! My crafting friends made these "sewing tidy mats" and I have to admit at first I wasn't too sure I'd want one. Theirs were beautiful, but it's not something I ever felt I needed.... until now. All my sewing supplies are in my wonderful Prym snap-on trays, which I love, but it meant opening them up every time I wanted something out of a tray. So I started looking on the Internet for a pattern. I found LOTS of pictures but no patterns except about two that looked incredibly complicated, so I just thought about it for awhile, then did some measurements, then boldly started cutting out. Here's what I ended up with:

I've had this sewing-themed fabric forever but never knew quite what to do with it and this seemed like the perfect project. It's a bright cotton, same fabric front and back and a layer of wadding in between. In case you haven't seen these, there are lots on Pinterest but few have any kind of dimensions or instructions, so I did my own thing. It turned out fine, but if I had to make another one, I'd measure better (especially the wadding or stuffing) and I'd be much more careful when sewing it. If someone looked at this one closely they'd find all kinds of craziness. The bottom line, however, is that it works:
And here's a hint... I wanted somewhere to put bent pins, broken needles, or small items like buttons, snaps, etc. and didn't want to just drop them into one of the pockets. So I took a plastic cup and stuck it into the pocket. That way, when I'm finished, I can pull out the cup and dispose safely of the pins and needles or find easily the small buttons, etc. It looks like this:

Of course, inevitably, my sewing room is now a mess! I sew in my little garden cabin but there's NEVER enough room, even if I sewed in a palace. 

I still have my blouse to sew. It's cut out but I can't find the kind of lace I want. I've bought some blue ribbon and green ribbon, but neither are "just right"!


This is the fabric and the trims I've found. Below is the blouse I'm making with it all. Sigh.... the world moves on!


Tuesday, 21 April 2015

A Little Something

Once again, like the pincushion, I have a (very) little project. This one is a case for my iPod Touch. First, a little background: for some time I’ve been searching everywhere for a case that also has storage for the headphones. What good is an iPod case without headphones, after all?! But nowhere could I find anything suitable.Someone suggested I make one, so off I went in search of a pattern (first mistake). I always think I can’t do anything without a pattern….. anyway, I found a very  promising project on YouTube so I followed the instructions for that, thinking it wouldn’t be too far off (second mistake). It looked easy enough also. Well, it was easy, but the finished product was too wide and not long enough to be perfect, but then perfection has never been my “thing” anyway.

So I cut it out from some fabric I’d been hoarding, bought the fusible fleece for a lining (a bit too heavyweight, but useable), and took it to our monthly craft get-together. I’ve mentioned our group many times in past posts. We used to be scrapbookers and cardmakers, but now ALL of us bring our sewing machines and have a right old-fashioned “sewing bee”. Here’s my finished case:

IMG_0282

As you can see, I barely got my iPod into the case and it’s much too wide. I think I may attempt another one, as this WAS basically easy, but I’ll narrow it and lengthen it. I also changed the strap to close on the same side as the earphone pocket. It just makes more sense to me.

On the day of our “bee”, we all went to visit a new shop in Birchington called Daisy Buds. If you’re local, they’re well worth checking out! Most of their stock is for quilters, as it’s colourful cottons and cotton blends, but it’s such good quality that it will make fine tops for summer. If I had a little girl to sew for, I could make LOTS of pretty little cotton dresses and playsuits, too. They also carry patterns (Simplicity, McCall’s, and New Look) and lots of pretty ribbons and trims. The prices are reasonable, so I did buy a couple metres of some gorgeous red print for making a peasant top.

I now have plenty of patterns, plenty of fabric, plenty of supplies and tools, so just now need to find plenty of TIME to get it done. I’m not going to go overboard too quickly, however, as I’m still struggling with Slimming World to lose more weight.

Speaking of Slimming World, I just this morning got the newest cookbook, “Mediterranean Magic” and it looks like the best one yet:

Slimming World's Mediterranean Magic

I love the food of Italy, Greece, Turkey, Morocco, and the Middle East in general. This cookbook has ALL my favourites: spanokopita, stifado, moussaka (all from Greece); lamb stew with aubergine, baba ghanoush (aubergine dip), falafel with houmus (all from Turkey and the Middle East), as well as lots of others. I’m now all enthused about Slimming World again!

Tuesday, 14 April 2015

New Friend

This is a quick post, just to introduce my new friend, Rosie! She arrived in a box  with a label that said "New Rose" (her model name) so that's why I named her Rosie.

I've never had a dress form before but there have been more than a few occasions when I could definitely have used one! She has lots of dials so I can adjust her measurements in several ways, including around   (bust, waist, hips) but also the length from back to waist, etc.

She's covered in a nice soft foam with a beautiful rose print (see photo below).

She also has a hem measuring thing. I haven't actually used her yet but have big plans! I have the patterns, the fabric, the thread, the sewing space, etc. but now just need to find the TIME! Sewing is not something I can do in short blocks of time (10 minutes here, 20 minutes there...). I need a whole morning or whole afternoon, or better yet a whole DAY!


And speaking of days, the past week has been the most beautiful ever. Today was warm, sunny, and only a light breeze. I threw open the door to the cabin, even a window, and turned up the CD player. It was heavenly! I know it won't last but it's great while it does.

We're also having much longer daylight hours now, which helps my mood considerably. I have more energy and feel much more positive. I never realized before how much the deep, dark winter months affect my mood. Onwards and upwards now!

Monday, 30 March 2015

A Craft Space

Although I mentioned in the last post that I would do a video of my craft cabin, I just haven’t had time to do it. So, I thought I’d post a couple of recent photos instead.

IMG_0236

This is my newest corner. I’m “transitioning” it into a sewing area. This photo was taken last week and I’m still making changes.

On the top shelf are my patterns. I’ve now put them all in order by maker (Butterick, Simplicity, etc) and then pattern number. I’ve made a Pattern Record, which is a word document that lists all my patterns and the yardages required. I can take that with me when I shop for fabric and/or patterns to avoid duplication.

On the third shelf I have my fat quarters and smaller yardages. Below those I have the fabric waiting to be made into clothing.

The bottom shelf is for sewing books and magazines. I just got the newest book from the Great British Sewing Bee, called “Fashion with Fabric” and it came with two metres of beautiful fabric and all full-size patterns. Yum!

Saturday I did the most exciting thing! I ordered a dress form. Now there’s no excuse not to get cracking! I’ve got the patterns, the fabric, the machine, the overlocker, and lots of bits that I probably DON’T need, so I’m going to cut out a blouse first.

I still have a paper pattern ready to cut some fabric to make a case that I found online for my iPod touch. But because that’s a small project, I’m planning to cut it out and then take it to our next crop-turned-sewing bee.

20150207_125949

The other side of the room is  basically unchanged. It’s still my scrapbooking, card making, stamping, and die cutting areas. I am finding however, that a lot of my old stash is easily transitioned to my sewing. For example, all my buttons, ribbons, and fibres that I  used for card making can also be used to make lots of fabric embellishments. Many of my dies can cut fabric, too, which makes them useful for applique. [Oh, and it drives me crazy on the Create and Craft TV channel when they say a-PLEE-kay instead of -- I looked up the correct pronunciation just to be sure -- APP-li-kay.]

So now I have to put together my dress form. It’s still in a HUGE box, so I have no idea what’s ahead! I’ll post a photo when I get her up and ready to greet the public.

Sunday, 29 March 2015

All about Time

Wow.... it's Sunday afternoon and I just had a much-needed little nap in the recliner. So many thoughts are running around in my head today......... mostly about time.

First, we changed the clocks today. We're now on "British Summer Time". I spoke to my son in Texas last night and he said they'd changed already to "Daylight Savings Time". I just find this absurd... why change at all? Or just leave it as "new time" and we "save" daylight all year round?!

Anyway, the "Style" magazine in the Sunday Times today is all about bringing back the fashions of the 1970s. More time distortion, IMHO! I can't say I look back at the 70s with any fondness. Not the fashions, not the culture, not the music (well, except for the Bee Gees perhaps), and certainly not my life in that decade. I started out as a married woman and had my second child in 1972. By the end of the decade, I'd just about lost my way.... divorced, went halfway around the world to live and work, and barely knew who I was anymore. Maybe a little nostalgia is okay but I certainly wouldn't want to revisit it! Big hair, wild fashions and colors in both clothing and home decor (who would want "avocado green" and "harvest gold" kitchens and bathrooms, deep orange shag rugs, macrame plant hangers, and ugly furniture?), a winding down of a horrible chapter in history called "the Vietnam War", and a feminist movement that derailed many of us. Not me, thank you.....

Yet, if you look at the sewing patterns now available, there is a real push for nostalgia there, too, called "Vintage" fashions. How funny! I remember making some of these when I was a teen-ager. The full skirts (and teeny-tiny waists) were actually popular in the late 1960s.

3997my22

One of my best friends (about 1961) in school was Evelyn Hildreth. We were just babes of course!  Her mom sewed for all Evelyn’s brothers and sisters (and there were many, I seem to remember). I’m sure she made this one or one just about like it for Evelyn.

I had a white dress with a full skirt and tiny straps and I thought I was just the “bees knees” in that dress, especially as I was always nice and tan in the summer. I can tell you, however, that our waists were NEVER quite THAT tiny!


confused s7009 The "shift" dresses (short, shapeless, simple to sew) were also popular in the late 1960s to the early 1970s. I'm sure I had some dresses made exactly like these in high school.

I read today that Simplicity pattern company has invested $1.2million in some machinery that reproduces and remaps these old patterns, and they’re now re-issuing them under the “Vintage” label. You can find patterns all the way back to the early 1900s.

But the prices have changed. Look at the Vintage ad below. The price has increased from 15 cents to 15 dollars, a one-hundred times increase!


vintage1920s I do think, however, that these 1920s dresses are among my favorites. They look so feminine. Unfortunately they didn't have the wash-and-wear fabrics we have today, so everything had to be handwashed unless it was plain cotton, with lots of ironing. No thanks to that malarkey  either!

So time marches on, then. And here I am, after all these years back into sewing again.

Tomorrow I’m going to post a video of my craft room since it’s been reorganized since the last one.

Oh, and sorry about all the US spellings: organize/organise, favorite/favourite, etc. I do know better, but it’s just easier and I have visitors from both sides of the pond.

Monday, 23 March 2015

Tisket a-Tasket and A Pink Craft Basket

As a member of our local South Street WI, I volunteered to make a basket to sell at the Annual Conference Meeting this week. All the WIs in East Kent will descend upon Margate for a day of WI business, a little entertainment, and a keynote talk by Michael Portillo, the journalist. I'm really looking forward to it.

The baskets can be for any theme, so of course I chose crafts. Last time I bought a beautiful little basket of sewing goodies, which I then gave to the woman who looks after our dog when we're away. At that time I wasn't into sewing so much. Now I'm not into papercrafts so much, so I just pulled from my own stash to fill this basket:
I loaded it with stamps, stamp pads, embossing powder, punches, packs of card blanks, and lots more. Sadly it didn't even make a dent in my stash collection! Even so, at £10 it will be a bargain to someone who does cardmaking or scrapbooking. Even the basket itself cost £4 and there is easily £50 worth of supplies. 

To finish it, I tied a pink ribbon around the basket, wrapped in cellophane, then tied a pink netting ribbon on top. I think it turned out pretty festive looking:


I just hope that someone else will find it attractive as it's a fund-raising effort for the East Kent Federation of the WI. Who knows, I might find another sewing basket for myself, only this time I'd probably be selfish and keep it!

Friday, 20 March 2015

Organizing for Sewing

I'm slowly (well, maybe not so slowly) getting organized now for my sewing projects. I've got my fabric all lined up and ready. I've organized all my patterns by manufacturer, then by pattern number, and my sewing space is taking over my papercraft space. Of course, I still have a lot of "weeding out" to do of the old crafts, but it's progressing.

My latest acquisition is a sewing box. I spent HOURS looking online for a good sewing box that I could store most of my supplies in, but yet still take along to our sewing meetings.  Everything I found was either too small, too big, or too expensive (DH is beginning to get nervous now about all my purchases!), but then I found this:


 It's called a Prym Jumbo Click Box and it surely IS "jumbo", but very lightweight and I think it's going to be just right. It came with the two boxes (7 liters each) and a lid. I've also ordered an extra box, which will be here next week. 

The plan is to use the top box for small supplies. I ordered a divider insert for that top box and have now put all my small supplies in there: needles, thimble, tracing wheel, seam rippers, tape measures, etc. In the second box, I've got my pinking shears, dressmaking shears, bobbin box, bobbin winder, and other things that wouldn't fit in the divider.


This is the divider insert. Several people online have said they use this system for their sewing supplies, also, and have found it ideal.

I'll use the bottom box, when it comes, for storing things like fat quarters, interfacing, batting, quilt rulers, etc. as the need arises.

My only complaint would be that the little "click" bit to open the box is pretty stiff and I can see a broken fingernail in my future. I'll just have to remember to go slowly and maybe use a key or something to pop it open until it's been opened a few times.

I've also spent much too much time online looking at sewing rooms. Just try a google search for "sewing room images" -- or Pinterest search for similar.... you'll lose a couple of hours! And then there are the sewing forums, the sewing online shops, and... take a deep breath... the YouTube videos for every kind of sewing technique, sewing project, sewing room decoration, or anything else related to "sewing".

I found a project on YouTube for making a cell phone ("mobile" phone in the UK) case that is just what I've been looking for. That will probably be my next blog post!

And thanks to the people who have left comments. I get very excited when I think someone has bothered reading this!

Monday, 16 March 2015

Owl's Things with You?

Our craft group met on Saturday. We can't really say "crop" anymore, because we're all into sewing now! Blame it on the Great British Sewing Bee, I guess! Whatever the reason, we're all thoroughly enjoying this new twist. On Saturday, each of us brought a sewing machine, so there were six of us going! What fun!


It did get a bit noisy but we didn't mind. We've gone from scrapbooking to cardmaking to Project Life to beading to knitting and now sewing.
Sometimes change is good.

That's my machine in the foreground, or rather its case. I'd already finished at this point and Barbara had moved her machine temporarily. Andrea's and Hazel's machines aren't in this picture.


Everyone said they're having lots of fun rediscovering the joy of sewing. I highly recommend it!  Our group has been meeting for the last eight years (!!) and we really look forward to getting together once each month to catch up on news, encourage each other's craft efforts, share patterns and tools and expertise, and of course share the all important cups of tea/coffee and pieces of cake or something similar. 


Barbara was making a round cushion. Diane was working on a pincushion which would be similar in style to Barbara's cushion, but on a smaller scale of course. Andrea was making a patchwork jewelry (yes, that's the American spelling of "jewelry") case and Hazel was working on a small quilt. Hazel had some stunning hexagons that she'd embellished with scraps of lace, ribbon, and doo-dads.

Hazel's Hexagons

How beautiful are these?! I'm afraid I don't have the time or patience for these, although Hazel says they're really quite quick to do. She used some beautiful dark blue silk.

She really did a beautiful job on these and used all sorts of odds and ends from her left overs.


And what did I make? A precious little owl pincushion from the book, Simple Patchwork Gifts by Christa Rolf. I have a couple of her other books, too, and love them. She provides the patterns and easy-to-follow instructions for each project.


The lighting on this owl makes it look very yellow in the photo. It's actually got no yellow at all, however. The felt piece on the eye area is actually off-white.


We just returned from a short break to Bournemouth and I found a shop called Fabricland. Oh my.... I thought I'd died and gone to heaven. Hundreds of rolls of fabric - all sorts - and inexpensive. I bought several pieces for clothes and for more "projects" like bags, aprons, etc. So now I'm off and running!

So much fabric, so little time!

Tuesday, 3 March 2015

Yes, I am!!! I'm doing it!

I finally have started sewing again. I suppose I'm weird because it takes me forever to actually DO anything. When I start thinking about a project, I'll buy a few books, collect a few websites in my Bookmarks/Favorites, spend lots of time dreaming about it, then... if I haven't lost interest by then ... I'll actually start working on it. So first, I had to drag out my sewing machine:
My Brother Innovis 600 - sadly neglected for about 4 years!


Of course, then I had to play awhile on scraps to make sure it still worked. It took about 30 minutes just to figure out how to get the self-threading needle to work! But it didn't let me down. It still sewed a near-perfect stitch. So I proceeded to cut out my project.


I decided to start small just to get back into the swing of things. I chose a little owl pincushion from the book by Christa Rolf titled Simple Patchwork Gifts. It's got all kinds of cute little sewing projects.


Christa Rolf's book


After I cut it out I realized I needed some rick-rack for the trim on the apron, so from my boxes of ribbons, I chose one that was perfect with the fabric. But although I have boxes and boxes of thread, I didn't have any that were THAT color, so off I went into town to get one little spool of lime green thread. Well, that took about 45 minutes as traffic on the (only) main street was snarled up with two buses, a big cement lorry ("truck" for those in the USA), and a fire engine (apparently just passing through). This main street is only wide enough for one car at a time in most places, so you either have to back up, to wait until the oncoming car can pass, or whatever. In this case, a black BMW got tired of waiting and drove on the sidewalk! It reminded me of traffic in Iran when I lived there.


But back to my story:  Once I got the thread, I was off and running. I now have it all cut out, the apron is done (thanks to the lime green thread!) and I just need to hand-stitch the apron on the front and the felt face to the front body. Here's the work in progress:
The various pieces in their raw state.

It's beginning to take shape!

It's going to be so cute! Of course, hand-stitching isn't my thing so it will take a little while to do that among all the other things (non-sewing) I'm doing. Once these are hand-stitched, I have to sew the front and back body pieces, then the wings, and of course stuff it all.  I'll post the final picture once that's done.